 您可能会认为,使用所有启动键盘命令,将 Mac 启动到 DFU 模式应该很简单,对吧?不!(Apple Silicon 的难度加倍!)您必须按照非常特定的顺序才能使其工作。即使如此,有时系统仍然会拒绝启动到 DFU 模式。
使用DFU模式快速重装macOS15到macbook
- 原文地址:[https://mrmacintosh.com/restore-macos-firmware-on-an-apple-silicon-mac-boot-to-dfu-mode/]
- 原作者: Mr. Macintosh
- 许可: “No Known Copyright” [https://creativecommons.org/public-domain/pdm/]
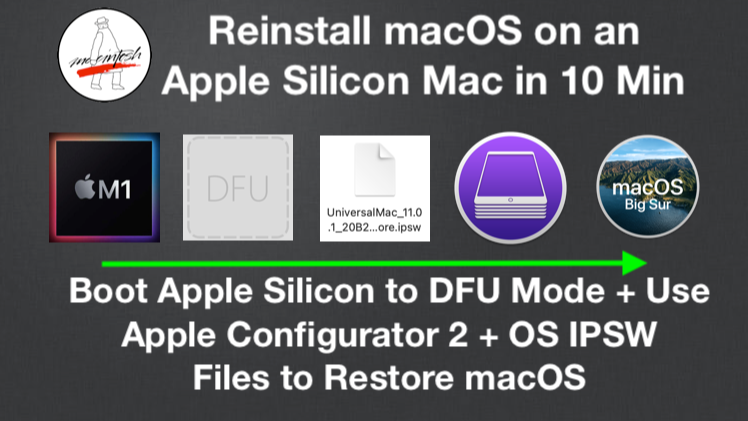
在 Apple Silicon M1 Mac 上恢复 macOS 固件 + 启动到 DFU 模式
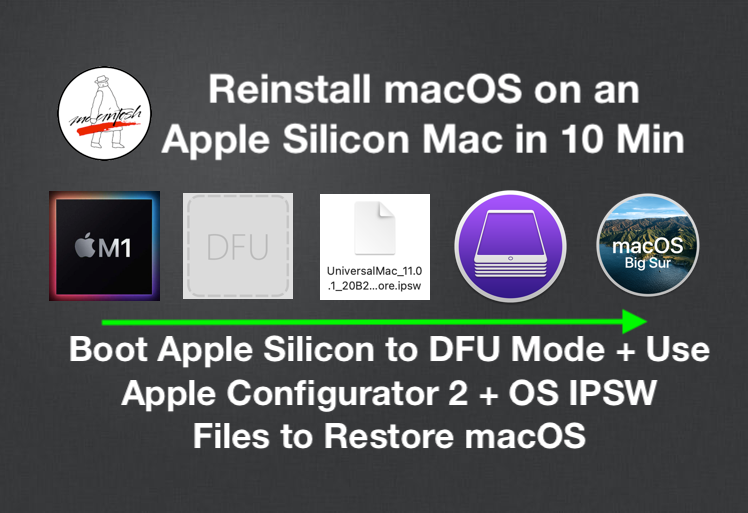
Apple Silicon Mac 可以像 iOS 设备一样安装 macOS!我将展示如何将 Apple Silicon Mac 启动到 DFU 模式,以便恢复 macOS。
本文将介绍如何在新的 Apple Silicon Mac 上恢复 macOS。安装 macOS 的首选方法是使用 macOS Recovery。但如果遇到问题,您可以使用 Big Sur USB 安装驱动器启动 Apple Silicon Mac。我在这里有一篇文章详细介绍了 macOS Recovery 的所有变化。
目录
- 更新
- 支持 Apple Silicon 的 Mac 列表
- 开始前的设置和线缆要求
- 下载 Apple Configurator 2 应用程序
- 如何将 Apple Silicon Mac 启动到 DFU 模式
- 您的 Mac 是哪个固件版本?
- M1 13″ MacBook Pro & Air (2020) 的说明
- M1 Mac Mini (2020) 的说明
- M1 24″ iMac (2021) 的说明
- 恭喜你!Apple Configurator 2 步骤
- 下载 macOS ISPW 文件
- 开始 Apple Silicon macOS 恢复 / 恢复
- 完成
- 是否可以通过 IPSW 文件降级到旧版本的 macOS?
- 感谢
- 排查 DFU 模式和固件更新问题
支持 Apple Silicon 的 Mac 列表
以下是支持此过程的 Apple Silicon Mac 列表:
- 2020 M1 13″ MacBook Pro
- 2020 M1 MacBook Air
- 2020 M1 Mac Mini
- 2021 M1 24″ iMac
开始前的设置和线缆要求
您需要满足以下要求(主机 Mac 将执行操作,目标 Mac 是需要恢复的 Mac):
- USB-C Mac 作为主机。
- 主机 Mac 必须安装 macOS 10.15.6 和 Apple Configurator 2.13.1 或更高版本。
- 主机 Mac 的互联网访问权限——“您可能需要配置您的网络代理或防火墙端口,以允许所有来自 Apple 的网络流量”。
- USB-C 到 USB-C 线缆——白色的 Apple USB-C 充电线即可。USB-C 线缆必须支持电源和数据。Apple 提到不支持雷电 3 到雷电 3 线缆,但我测试过,它也可以正常工作。
- 主机 Mac 可以将线缆插入任何位置。
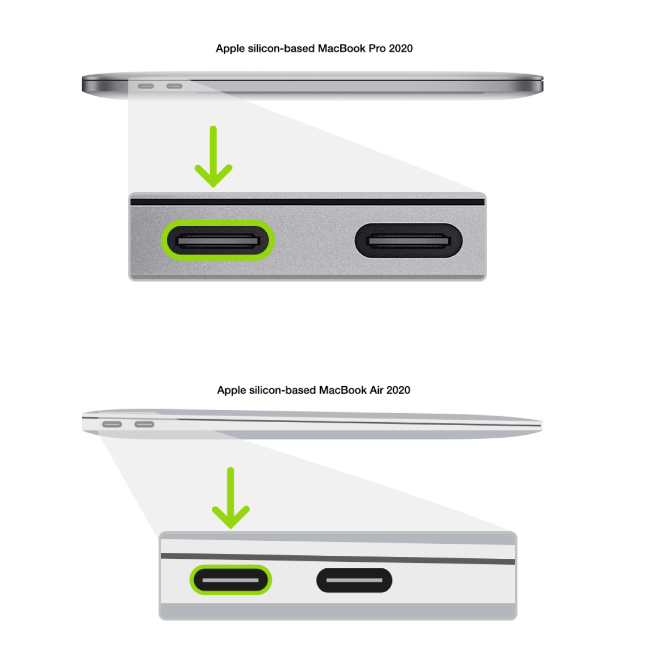
- 目标 Mac 必须将 USB-C 线缆插入左侧 USB-C 端口。对于笔记本电脑,是靠近 Mac 后部或屏幕的端口;对于 Mac Mini,是靠近以太网端口的端口。(这两个位置都与 T2 Mac BridgeOS 恢复位置相反!)
如果未满足所有先决条件,启动到 DFU 模式或升级 macOS 固件可能会失败。
下载 Apple Configurator
下载 Apple Configurator 2 应用程序。需要 2.13.1 或更高版本。
如果您没有 Apple Configurator 2,现在可以从 Mac App Store 下载:
Apple Configurator
如何将 Apple Silicon Mac 启动到 DFU 模式
您可能会认为,使用所有启动键盘命令,将 Mac 启动到 DFU 模式应该很简单,对吧?
不!(Apple Silicon 的难度加倍!)
您必须按照非常特定的顺序才能使其工作。即使如此,有时系统仍然会拒绝启动到 DFU 模式。
Apple 的说明
您可以通过以下链接找到 Apple 的启动到 DFU 模式的说明:
使用 Apple Configurator 2 修复或恢复搭载 Apple 芯片的 Mac
准备 Apple 笔记本电脑
如果按照这些说明仍然无法启动,请继续查看以下内容。

按下电源按钮。
- 同时按住电源按钮,再同时按下以下三个键约 10 秒钟:
- 右侧的 Shift 键
- 左侧的 Option 键
- 左侧的 Control 键
- 10 秒后,立即松开这三个键,但继续按住电源按钮,直到它出现在 Apple Configurator 中。

注意: 您不会看到 Apple 笔记本电脑的屏幕有任何活动。
您的 Mac 是哪个固件版本?
您是否在收到 Mac 后立即将其更新到 Big Sur 11.0.1?如果没有,固件版本将为 6723.41.11。
要查找固件版本,请点击 Apple 图标 > 关于本机 > 系统报告。
查找系统固件版本。
如果您运行的是 Big Sur 11.0 且固件版本为 6723.41.11,则需要先启动到 macOS Recovery 选择屏幕,然后再尝试启动到 DFU 模式。
如果您将 Mac 更新到 11.0.1 并且运行的是固件版本 6723.50.2 或更高版本,您可以按照正常说明操作。您可以直接从关机状态启动到 DFU 模式,而无需先启动到 macOS Recovery 选择屏幕。
M1 13″ MacBook Pro & MacBook Air 的说明
将 Apple Silicon Mac 启动到 DFU 模式已被证明非常困难。您可能会多次尝试 Apple 的说明,但仍无法进入 DFU 模式。
一旦满足了上述所有先决条件,请按照以下说明操作,您应该每次都能成功进入 DFU 模式。
- 目标 Mac 必须处于关闭状态才能开始。
- 按住电源按钮、右侧的 Shift 键、左侧的 Control 键和左侧的 Option 键 10 秒钟(数 10 个“1000”),然后松开除电源按钮外的所有键。继续按住电源按钮额外 8 秒钟,直到总共达到 18 秒。如果超过 20 秒仍未看到 DFU 图标,则需要重新尝试该过程。
- 如果目标 Mac 正确启动到 DFU 模式,主机将在 Apple Configurator 2 中显示一个大的 DFU 图标。
- 在 AC2 主机 Mac 上看到 DFU 图标弹出后,您可以松开电源按钮。
M1 Mac Mini (2020) 的说明
2020 年 Mac Mini 的说明是使用靠近以太网端口的 USB-C 端口。
- 断开 Mac Mini 的电源线。
- 将 USB-C/雷电线缆插入靠近以太网端口的 USB-C 端口。
- 将另一端插入主机 Mac。
- 按住电源按钮的同时,将 Mac Mini 连接到电源,并继续按住电源按钮约 3-5 秒钟。
- 您现在应该在主机 Mac 上看到 DFU 图标。
M1 2021 年 24″ iMac 的说明
2021 年 24″ M1 iMac 的说明是使用靠近磁性电源端口的 USB-C 端口。2 端口和 4 端口版本的说明相同。
- 断开 iMac 的磁性电源线。
- 将 USB-C 线缆插入靠近电源端口的 USB-C 端口。
- 将另一端插入主机 Mac。
- 按住电源按钮的同时,连接 iMac 的磁性电源插头,并继续按住电源按钮约 3-5 秒钟。
- 您现在应该在主机 Mac 上看到 DFU 图标。
恭喜你!Apple Configurator 2 步骤
最困难的部分已经完成。现在我们可以恢复目标 Mac 上的 macOS。首次打开 Apple Configurator 2 时,屏幕将如下所示。
当您的 Mac 启动到 DFU 模式后,您将在 Apple Configurator 2 中看到此屏幕。现在您可以进行下一步了。
下载 macOS ISPW 文件(可选)
Apple Configurator 2 2.13.2 版将像 iOS 一样自动下载所需的 IPSW 文件。假设您想下载 IPSW 文件以便多次恢复进行测试,您可以从我的数据库中获取。
[mrmacintosh.com/apple-silicon-m1-full-macos-restore-ipsw-firmware-files-database/]
下载 macOS IPSW 文件后,您就可以进行恢复了。
开始 Apple Silicon macOS 恢复 / 恢复
1. 恢复选项
恢复选项将仅重新安装 macOS Recovery。转到步骤 2 进行恢复。
您现在可以通过单击“操作”>“高级”>“恢复设备”来恢复 Apple Silicon Mac 上的 macOS Recovery。
恢复将在您的 Apple Silicon Mac 上重新安装 macOS Recovery。此选项保留用户数据。
2. 恢复选项。
恢复将重新安装 macOS Recovery,擦除您的 SSD 硬盘并重新安装 macOS。
您现在将看到一条警告消息。是否要将“MacBook Pro”恢复到出厂设置和最新固件版本?
单击“恢复”按钮开始。第一步将直接从 Apple 下载最新的 macOS IPSW 固件文件。
您也可以将 macOS IPSW 文件拖到 DFU 图标上以开始恢复。
将 macOS 11 IPSW 文件拖到 DFU 图标上后,您将收到此弹出窗口。您可以选择“恢复”以擦除驱动器并重新安装 macOS。此过程仅需约 15 分钟。
完成
如果您想查看更多信息,可以单击“查看”并查看新的活动窗口。
整个过程仅需一点时间。大部分时间都花在下载巨大的 13GB macOS Big Sur IPSW 文件上。这就是为什么将 IPSW 文件保存在外部硬盘或其他地方很不错的原因。当您将 IPSW 文件拖到 Apple Configurator 2 上时,恢复速度会非常快!通常只需约 10 分钟!
完成后,Mac 将自动启动。
是否可以通过 IPSW 文件降级到旧版本的 macOS?
答案是肯定的,请查看下面的链接以获取说明。
但前提是 IPSW 文件仍由 Apple 签名。如果 Apple 停止对 IPSW 文件进行签名,您需要更改启动安全性以允许这样做。(请记住,Apple 尚未停止对任何 macOS 安装程序的签名,因此我们将拭目以待。)
排查 DFU 模式和固件更新问题
注意:11/17/20!在我收集到 Apple Silicon 数据之前,我将保留 T2 BridgeOS 故障排除部分。
我无法将 Mac 启动到 DFU 模式。正如我上面提到的,这是整个过程中最困难的部分。请继续尝试我上面列出的步骤。有时需要多次尝试才能成功。
您可以使用系统信息查看 USB-C 端口是否列出了您的 Mac 处于 DFU 模式。
BridgeOS 恢复错误 79 - 无法在此设备上恢复操作系统。操作无法完成。(AMRestoreErrorDomain 错误 79 - 无法处理消息类型 StatusMsg)[AMRestoreErrorDomain – 0x4F (79)] - 如果您收到此错误,则表示 BridgeOS 更新失败,无法完成。系统将无法启动。开机时屏幕将变黑。Mac 必须带到 Apple Store 进行维修。
BridgeOS 恢复错误 10 - BridgeOS 恢复失败!这很可能是因为主机 Mac 比目标 Mac 落后 1 或 2 个操作系统版本。主机和目标 Mac 需要运行相同的操作系统版本。
如果您的目标 Mac 运行的是 10.15,那么您的主机 Mac 需要运行 10.15。
无法在此设备上恢复操作系统。
操作无法完成。(AMRestoreErrorDomain 错误 10 - 无法处理消息类型 StatusMsg)[AMRestoreErrorDomain – 0xA (10)]
主机 Mac 和目标 Mac 在恢复过程中断开连接。 - 错误 4005
无法在此设备上恢复操作系统。
放弃等待设备从 RestoreOS 状态转换到 BootedOS 状态。[com.apple.MobileDevice.MobileRestore – 0xFA5 (4005)]
当您中断恢复过程时,会出现此错误。
或者,您可能会在使用 Apple Configurator 2 2.12.1 版时收到此错误,因为该过程似乎从未正确完成。如果目标 Mac 唤醒到登录窗口,即使进度条显示 100%,该过程也已完成。拔下 USB-C 线缆后,您将收到上述错误。
Apple Configurator 2 报告恢复状态而不是 DFU 状态。
如果您看到“恢复”,则表示 BridgeOS 无法启动,这是您打开 Mac 时的默认状态。
由于操作系统版本不匹配导致 BridgeOS 恢复失败!目标 Mac 是以前的操作系统,例如 10.14,尝试恢复 10.15 Mac,更新将失败,并出现错误 10
如果 Mac 已经升级失败,则可能已经是这种状态。如果是这样,您可以尝试 BridgeOS 恢复。
配置器无法执行请求的操作。Apple 控制器设备不支持此操作。
这意味着您选择了“操作”>“更新”,这是不支持的。您需要选择“操作”>“高级”>“恢复设备”
Apple Configurator 2 BridgeOS 固件下载位置。
感谢 MrMacintosh 读者 Max C 让我知道 BridgeOS 固件文件的位置。
~/Library/Group Containers/Group.com.apple.configurator/Library/Caches/Firmware
Apple Configurator 2 日志位置
~/Library/Group Containers/xxxxxxx.group.com.apple.configurator/Library/Logs
请注意,对于 2.12.1 版,日志似乎不起作用。
恢复 macOS Apple Silicon
常见问题解答
已修复!
以下是我所做的所有事情。警告,这很乱,与结论性工作流程相反:
- 首先,我错了,恢复模式(iboot?)仍然有效。或者至少第二天早上它起作用了……它只是坐在那里旋转(很可能是在尝试解决混乱的 APFS 容器情况),但我可以选择进入恢复模式并继续。
- 这次当我尝试从互联网安装操作系统时,我收到了“无法个性化”错误。至少我现在在更熟悉的领域了……
- 我按照 Apple 支持文章 如果更新或安装 macOS 时出现错误 中的“resetpassword”程序进行操作。
在“您的 Mac 已激活”后,我重新打开终端尝试手动“curl”部署,但意识到我没有“未命名”卷,或任何看起来像正确内部存储的东西…… - 我再次尝试了磁盘工具,但由于“被进程 (0) 内核占用”错误,无法擦除。验证磁盘瞬间没有发现错误。
- 然后我再次尝试了配置 2 恢复……再次失败,第 n 次了。
- 再次重复 AppleKB resetpassword 程序。请注意,第 10 步说要运行两次!嗯……因为“此卷上没有用户需要恢复”,所以无法再次运行。您的选择是退出,或退出。😃
- 现在……我尝试从 USB 记忆棒上的 11.2 可启动安装程序进行安装。
第一个明显的区别是,第一次,我的目标选项不是 Macintosh HD 和数据,而是“未命名”。 - Big Sur 安装完成,作为甜点,启动到……闪烁的雪花。Drew 的共享相册 是不是很可爱?大写锁定无响应。我重新插入了 HDMI 线缆 - 什么也没有。然后当我在寻找另一根线缆时,再次触摸键盘,它现在可以工作了,屏幕出现,完成了一个实际的、已安装的 Big Sur 11.2 的实际启动。万岁!
那么我们从中学到了什么?好问题。
- 有一点我很确定,这个系统之前是 11.0。所以与 MrMac 一致,它确实遭受了“第一代”疾病的困扰。我希望现在 11.2 已经解决了这些问题。
- 在我的情况下,似乎产生差异的一件事是从 USB 驱动器安装,而不是使用 Configurator2 闪存文件。也许 IPSW 需要适当的存储空间来复制自己,而 USB 部署在重置 APFS 内部 SSD、对其卷进行祝福等方面做得更好。
我遇到的最基本的硬件重置是“擦除 Mac”命令,该命令可在不使用 DFU 模式或第二台 Mac 作为主机的情况下访问。
-
将您关心的任何数据备份到其他物理存储设备。您正在擦除您的 Mac,所有内容都会在此过程中丢失;将其备份到其他地方。
-
关闭 Mac。重新启动到启动选项菜单(重新打开 Mac 电源时,持续按住电源按钮,直到看到确认过程正在加载的提示)。选择“选项”,然后选择“继续”。
-
当您到达恢复菜单提示时,选择显示左上角的“实用程序”菜单,然后选择“终端”。
-
在终端提示符下,键入“resetpassword”作为一串字符,不带引号,然后按回车键。
-
单击出现在终端窗口后面的重置密码提示。选择显示左上角的“恢复助手”菜单,然后选择“擦除 Mac…”
-
这是不可回头的时刻。一旦您在出现的提示窗口中选择小的蓝色擦除 Mac…链接,所有内容都将消失;我很高兴报告,没有授权用户难题!
重新安装 macOS 后,我能够创建一个全新的、开箱即用的体验,并顺利创建一个新的本地管理员帐户,然后将我现有的管理员帐户从 2010 MacPro 迁移到这个 2020 MacMini。
所有功劳都归功于 StackExchange 的 Kay V:
对于那些遇到“没有可用于授权的用户…”错误或无法在重新安装 macOS 后完成帐户创建的人,一个更简单的解决方案(不需要第二台 Mac)对我来说很容易。感谢 StackExchange 用户 Kay V:
“……在按照这些步骤操作之前,您应该将计算机从任何 iCloud 帐户中删除;我还没有测试过该建议;如果您也发现该步骤有用,请发表评论)
关闭计算机
按住电源按钮,直到显示“选项”图标
选择“选项”图标
当下一屏幕加载时,选择菜单项以启动终端
在终端中键入“resetpassword”并按回车键
当重置密码框出现时,选择菜单项以擦除 Mac(见下面的注释)
在新弹出窗口中确认擦除 Mac 的选项。
擦除后,退出回到恢复
重新安装操作系统
安装完成后,创建帐户。
Remiks 报告的结果与我的结果一致:此修复在第一次尝试时就起作用。
另一方面,官方 Apple 步骤对我来说反复失败,两位 Apple 高级顾问在尝试协助时警告我,已发布的说明不可靠(是的,他们也因 Apple 提供的步骤在尝试后反复失败而感到沮丧)。
关于查找擦除 Mac 的菜单项的注释(感谢 @brendan-duke 的编辑!):
单击重置密码框旁边的空白处。
当菜单出现在屏幕顶部时,选择“恢复实用程序”,然后选择“擦除 Mac”。”
嗨,感谢您撰写这些 Macbook M1 DFU 等指南!这些在今天开始测试我们的新 Mac 并不得不将它们一次又一次地重置为出厂设置时帮助很大。一次又一次 🙂
快速提示:我注意到您的指南在如何激活 DFU 模式方面非常准确,但时间至关重要(我的 1-one thousand 计数不够)!一旦我开始用秒表计数按键,一切就正常工作了。所以 10 + 8 秒规则非常重要 🙂
PS。此外,如果您的 Mac 已加入 DEP(例如通过 Apple Business Manager 加入 MDM 解决方案),清空磁盘后,您必须启动一次以“激活”Mac(需要 WiFi)。之后,Apple Configurator 就可以正常工作了。
资源文件:
通过网盘分享的知识:macOS安装包
链接: [https://pan.baidu.com/s/5fjrU3Bh0A_ASYPluwq20Lg]
--来自百度网盘超级会员v4的分享
Restore macOS Firmware on an Apple Silicon M1 Mac + Boot to DFU Mode
With Apple Silicon Macs, you can install macOS just like you can with iOS! I will show you how to boot your Apple Silicon Mac into DFU Mode so you can Restore macOS.
This article will go over how to restore macOS on your new Apple Silicon Mac. Your first line of defense for installing macOS on Apple Silicon should be macOS Recovery. But if for some reason you are having problems with that you can boot your Apple Silicon Mac with a Big Sur USB installer drive. I wrote an article covering all the changes to macOS Recovery here.
Contents
- Updates
- List of Apple Silicon Compatible Macs
- Setup and Cable Requirements before you begin
- Download Apple Configurator 2 app
- How to Boot your Apple Silicon Mac into DFU Mode
- Which Firmware version is your Mac on?
- Instructions for the M1 13″ MacBook Pro & Air (2020)
- Instructions for the M1 Mac Mini (2020)
- Instructions for the M1 24″ iMac (2021)
- You made it! Apple Configurator 2 Steps
- Download macOS ISPW file
- Begin Apple Silicon macOS Revive / Restore
- Finishing Up
- Can I Downgrade from an older version of macOS via IPSW Files?
- Thanks
- Troubleshooting DFU Mode & Firmware Update Problems
List of Apple Silicon Compatible Macs
This is a list of Apple Silicon Macs that this process is compatible with.
- 2020 M1 13″ MacBook Pro
- 2020 M1 MacBook Air
- 2020 M1 Mac Mini
- 2021 M1 24″ iMac
Setup and Cable Requirements before you begin.
You will need to meet the following requirements –
(The Host Mac will do the work and the Target Mac is the Mac you need to Restore)
- USB-C Mac as the Host Machine.
- The Host Mac must have at least macOS 10.15.6 and Apple Configurator 2.13.1 or newer installed.
- Internet access on the Host Mac – “You may need to configure your web proxy or firewall ports to allow all network traffic from Apple”
- USB-C to USB-C Cable – The white Apple USB-C Charge will work fine. (USB-C Cable MUST Support Power & Data). Apple notes that a Thunderbolt 3 to Thunderbolt 3 cable is not supported but I’ve tested it and it works fine.
- The Host Mac can have the cable plugged in anywhere.
- The Target Mac MUST have the USB-C Cable Plugged in to the Left Hand side USB-C port. For Laptops the port closest to the back of the Mac or screen) For the Mac Mini it’s the port closest to the ethernet port. (BOTH LOCATIONS ARE OPPOSITE of the T2 Mac BridgeOS restore locations!)
If you don’t meet all the prerequisites booting to DFU Mode or Upgrading macOS Firmware might fail.
Download Apple Configurator
Download Apple Configurator 2 app. Version 2.13.1 or higher is required.
If you do not have Apple Configurator 2, you can download it now from the Mac App Store with this link.
[https://apps.apple.com/us/app/apple-configurator/id1037126344?mt=12]
How to Boot your Apple Silicon Mac into DFU Mode
With all the startup keyboard commands you can issue a Mac, booting into DFU Mode should be pretty simple right?
NOPE! (x2 this time for Apple Silicon!)
You have to follow a very particular sequence to get this to work. I have attempted to find the exact way to get this to work every time. Even then sometimes the system will refuse to Boot into DFU mode.
Apple’s Instructions
You can find Apple’s instructions for booting into DFU mode here.
[https://support.apple.com/zh-cn/guide/apple-configurator-2/apdd5f3c75ad/mac]
Prepare the Apple notebook computer
If these instructions do not work fo you continue below.
Press the power button.
While holding down the power button, at the same time press all three of the following keys for about 10 seconds:
The right Shift key
The left Option key
The left Control key
After 10 seconds, immediately release the three keys but continue to hold down the power button until it appears in Apple Configurator
Note: You won’t see any screen activity from the Apple notebook computer.
Which Firmware version is your Mac on?
Did you update your Mac to Big Sur 11.0.1 from 11.0 when it arrived? If you didnt the firmware will be
6723.41.11
To find the firmware version click the Apple icon > About this Mac > System Report.
Look for System Firmware Version.
If you are on Big Sur 11.0 and firmware version 6723.41.11 you will need to boot to the macOS Recovery selection screen first before attempting to boot into DFU mode.
If you updated your Mac to 11.0.1 and are running Firmware Version 6723.50.2 or newer you can follow the normal instructions. You can boot to DFU mode from power off instead of booting to the macOS recovery selection screen first.
My Instructions for the M1 13″ MacBook Pro & MacBook Air
It has proven difficult to get an Apple Silicon Mac into DFU mode. You could try Apple’s instructions above multiple times and STILL not get into DFU mode.
Once you have meet all of the pre requisites above, follow the instructions below to should get you into DFU Mode every time.
- The Target Mac must be OFF to begin.
- Hold down the Power button, Right Shift, Left Control and Left Option keys for 10 Seconds (count 1 one thousand) then let go of every key except for Power . Keep holding down the power button for an additional 8 seconds until you get to 18 seconds total. If you count more than 20 seconds and don’t see the DFU icon, you will have to try the process again.
- When the Target Mac is booted into DFU mode correctly, the host will show a big DFU icon in Apple Configurator 2.
- After you see the DFU picture pop up on the AC2 Host Mac you can let go of the Power Button.
Instructions for the M1 Mac Mini (2020)
The Mac Mini 2020 instructions are to use the USB-C port is closest to the Ethernet port.
- Disconnect the power cord from the Mac Mini.
- Plug USB-C/Thunderbolt cable into the USB-C port next to the ethernet port.
- Plug the other end into the Host Mac.
- While holding down the power button, connect the Mac Mini to power and continue to hold the power button for about 3-5 seconds
- You should now see the DFU logo on the Host Mac.
Instructions for the M1 2021 24″ iMac
The 24″ M1 iMac (2021) instructions are to use the USB-C port is closest to the magnetic power port. The instructions are the same for both the 2 and 4 port version.
- Disconnect the magnetic power cord from the iMac.
- Plug USB-C cable into the USB-C port next to the power port.
- Plug the other end into the Host Mac.
- While holding down the power button, connect the iMac magnetic power plug continue to hold the power button for about 3-5 seconds
- You should now see the DFU logo on the Host Mac.
You made it! Apple Configurator 2 Steps
The hard part is now over. Now we can restore macOS on the Target Mac. When you first open Apple Configurator 2 the screen will look like this.
Once your Mac is booted to DFU mode, you will see this screen on Apple Configurator 2. You are now ready for the next step.
Download macOS ISPW file (Optional)
Apple Configurator 2 version 2.13.2 will automatically download needed IPSW file just like it can for iOS. Let’s say that you want to download the IPSW so you can restore multiple times for testing, you can get it from my database below.
[mrmacintosh.com/apple-silicon-m1-full-macos-restore-ipsw-firmware-files-database/]
Once you’ve downloaded the macOS IPSW file, you are ready for Restore.
Begin Apple Silicon macOS Revive / Restore
1. Revive Option
The revive option will ONLY reinstall macOS Recovery. Go to step 2 for Restore.
You are now ready to restore either macOS Recovery with revive by Clicking Actions > Advanced > Revive Device.
Revive will reinstall macOS Recovery on your Apple Silicon Mac. This option retains user data.
2. Restore Option.
Restore will Reinstall macOS Recovery, ERASE your SSD hard drive and reinstall macOS.
You will now see a warning message. Do you want restore “MacBook Pro” to it’s Factory settings and latest firmware version?
Click the Restore Button to begin. Step one will download the latest macOS IPSW Firmware file directly from Apple.
You can also drag the macOS IPSW File over to the DFU icon to begin the restore.
After dragging the macOS 11 IPSW File over to the DFU logo you will get this pop up. You can select Restore to erase your drive and reinstall macOS. The process will only take about 15 minutes.
Finishing Up
If you would like to see more information you can click View and see a new activity window.
The entire process will only take a while. Most of the time is spent downloading the huge 13GB macOS Big Sur IPSW File. This is why it’s nice to keep the IPSW on an external hard drive or something. When you drag the IPSW File over to Apple Configuator 2, the restore will be super quick! Normally it only takes about 10 min!
When complete the Mac will automatically Boot up.
Can I Downgrade from an older version of macOS via IPSW Files?
The answer is YES, follow the link below for an explanation.
But only if the IPSW file is still signed by Apple. If Apple stops signing the IPSW file you will need to change the Boot Security to allow this. (Keep in mind Apple has not stopped signing any macOS installers yet, so we will see.)
Troubleshooting DFU Mode & Firmware Update Problems
NOTE 11/17/20! UNTIL I’M ABLE TO GATHER APPLE SILICON DATA I WILL LEAVE THE T2 BRIDGEOS TROUBLESHOOTING SECTION HERE.
I can’t get my Mac to boot into DFU mode. This is the toughest part of the whole process as I mentioned above. Keep trying the steps I listed above. Sometimes it takes multiple attempts to get his to work.
You can use System Information to see if the USB-C port lists your Mac in DFU Mode.
BridgeOS Restore Error 79- The OS Cannot be restored on this device. The Operation couldn’t be completed. (AMRestoreErrorDomain error 79 – Failed to handle message type StatusMsg) [AMRestoreErrorDomain – 0x4F (79)] – If you get this error it means that the BridgeOS update has failed and is unable to complete. The system will be unable to boot. When powered on the screen will be black. The Mac will have to be brought to an Apple Store for Service.
BridgeOS Restore Error 10 – The BridgeOS Restore failed! This is most likely because the host Mac was 1 or 2 OS Versions behind the Target Mac. The Host and Target Mac need to be on the same OS Version.
If your Target Mac is on 10.15, then your Host Mac needs to be on 10.15.
The OS Cannot be restored on this device.
The operation couldn’t be completed. (AMRestoreErrorDomain error 10 – Failed to handle message type StatusMsg) [AMRestoreErrorDomain – 0xA (10)]
Host Mac and Target Mac Disconnected during restore. – Error 4005
The OS Cannot be restored on this device.
Gave up waiting for device to transition from RestoreOS state to BootedOS State. [com.apple.MobileDevice.MobileRestore – 0xFA5 (4005)]
This error will come up when the restore process has been interrupted.
Or, you might get this using Apple Configurator 2 version 2.12.1, as the process never seems to complete properly. If the Target Mac awakes to the login window the process is complete even though the progress bar is at 100%. After unplugging the USB-C cable you will get the error above.
Apple Configurator 2 Reports RECOVERY instead of DFU Status.
If you see RECOVERY this means that BridgeOS is unable to boot and is the default status when you power on the Mac.
Failed BridgeOS Restore due to OS Version Mismatch! The Target Mac is a previous OS i.e 10.14 trying to restore a 10.15 Mac, the update will fail with an Error 10
If the Mac already failed the Upgrade, it could already be in this status. If so, you can attempt a BridgeOS restore.
Configurator could not perform the requested action. Apple Controller devices do not support this action.
This means that you selected Actions > Update, which is not supported. You need to select Actions > Advanced > Revive Device
Apple Configurator 2 BridgeOS Firmware Download Location.
Thanks MrMacintosh Reader Max C for letting me know the location of the BridgeOS Firmware files.
~/Library/Group Containers/Group.com.apple.configurator/Library/Caches/Firmware
Apple Configurator 2 Log Location
~/Library/Group Containers/xxxxxxx.group.com.apple.configurator/Library/Logs
Note that for version 2.12.1 the log does not seem to be working.
Restore macOS Apple Silicon
Questions&Answers
Fixed!
Here is everything I did. Warning, it’s messy and the opposite of a conclusive workflow:
- First of all, I was wrong, Recovery mode (iboot?) still worked. Or at least it worked the next morning… It just sat there spinning (while trying to figure out the messed-up APFS container situation, most likely), but I could just choose to enter Recovery and proceed.
- This time when I tried to install the OS from the internet, I got the “failed to personalize” error. At least I was in more familiar territory now…
- I followed https://support.apple.com/en-us/HT211983 for the “resetpassword” procedure.
After “Your Mac is activated” I reopened Terminal to try the manual “curl” deployment, but realized I didn’t have an ‘Untitled’ Volume, or anything that looked like proper internal storage… - I tried Disk Utility again, but couldn’t erase because of the ‘taken by process (0) kernel’ errors. Verify Disk instantly found no errors.
- Then I tried a Configuration 2 Restore again… which failed again for the nth time.
- Repeated the AppleKB resetpassword procedure again. Note that step 10 says to run it twice! Hmmmm…. Couldn’t run it again because “There are no users on this volume to recover.” Your options are exit, or exit. 🙂
- Now……….. I tried installing from a bootable installer of 11.2 on a USB stick.
The first noticable difference was that for the first time, my destination options weren’t Macintosh HD and Data, but “Untitled”. - Big Sur installed, and for dessert booted into… flashing snow. https://photos.app.goo.gl/iAMWLhBkc1tboETr6 Isn’t that lovely? Caps lock nonresponsive. I replugged the HDMI cable – nothing. Then as I was fishing for another cable, I touched the keyboard again, which happened to work now and the screen came up, finishing an actual boot into an actual, installed Big Sur 11.2. Hurrah!
So what did we learn here? Good question.
– One thing, I’m fairly sure that this system was on 11.0 before. So in line with MrMac, it really suffers from “gen 1” ailments. I hope things got ironed out by now with 11.2.
– And the one thing that seemed to have made the difference in my case, was to install from a USB drive and NOT a Configurator2 flash file. Perhaps the IPSW needs proper storage to copy itself into first, while a USB deployment does better at resetting APFS on the internal SSD, blessing its volumes, etc.
The most fundamental reset available on the hardware that I have come across is the Erase Mac command which is accessible without having to use DFU mode or a second Mac as a host.
• Back up any data you care about onto some other physical storage device. You are erasing your Mac, everything goes with this process; back it up somewhere else.
• Shut down Mac. Reboot into Startup Options menu (when powering Mac back on keep the power button depressed continuously until you see the prompts that confirm the process is loading). Select “Options” and then “Continue”.
• When you get to the Recovery menu prompt, choose The Utilities menu near the top left of your display and select Terminal.
• At the terminal prompt, type “resetpassword” as one string of characters, without quotes and press Return.
• Click onto the Reset Password prompt that appears behind the Terminal window. Select the “Recovery Assistant” menu near the upper left of your display and select “Erase Mac…”
• This is the point of no return. Once you select the small blue Erase Mac… link in the prompt window that appears, its all gone; along with the no authorized user conundrum I’m happy to report!
Once I reinstalled macOS, I was able to create a fresh, out of box experience and seamlessly create a new, local administrator account and subsequently migrate my existing admin account to this 2020 MacMini from the MacPro 2010 it was replacing.
All credit goes to Kay V on StackExchange:
For those experiencing a “No users available for authorization…” error or unable to complete creation of an account after reinstalling macOS, a much simpler solution not requiring a second Mac worked easily for me. Thanks to StackExchange user Kay V:
“… before you follow these steps, you should remove the computer from any iCloud accounts; I’ve not tested that recommendation; please comment you also find that step useful)
shut down your computer
hold the power button until the “options” icon shows
select the “options” icon
when next screen loads, select menu item to launch terminal
in terminal type “resetpassword” and hit enter
when a reset password box appears, select menu item to erase Mac (see note below)
in new pop up confirm option to erase Mac.
once erased, exit back to recover
reinstall the operating system
once installed, create the account.
Remiks’ reported result matches mine: this fix works on the first try.
On the other hand, the official apple steps failed repeatedly for me, and two Apple Sr. Advisors warned me as they attempted to assist that the published instructions were unreliable (yep, they were also frustrated that the Apple-supplied steps failed try after try).
Note about finding the menu item to erase Mac (thanks @brendan-duke for the edit!):
Click somewhere off to the side of the reset password box.
When menu appears at the top of the screen, select “Recovery Utilities” then “erase Mac”.”
Hi, and thank you for writing these Macbook M1 DFU etc. guides! These helped a LOT today when I started testing our new Mac’s and had to reset them to factory settings again and again. And again 🙂
Quick tip: I noticed that your guide is spot-on on how to get the DFU mode activated, BUT the timing is crucial (my 1-one thousand didn’t cut it)! As soon as I started counting the keypresses with a stopwatch, everything just WORKED. So the 10 + 8 seconds rule is quite important 🙂
PS. Also, if your Mac is DEPed (enrolled with say, Apple Business Manager to a MDM solution), after emptying the disk, you will have to boot it once to “activate” the Mac (WiFi required). After this, the Apple Configurator works fine.
参考链接
- [mrmacintosh.com/how-to-reinstall-macos-on-your-apple-silicon-mac-everything-you-need-to-know/]
- [https://mrmacintosh.com/apple-silicon-m1-full-macos-restore-ipsw-firmware-files-database/]
- [https://mrmacintosh.com/macos-sequoia-full-installer-database-download-directly-from-apple/]
- [mrmacintosh.com/how-to-restore-bridgeos-on-a-t2-mac-how-to-put-a-mac-into-dfu-mode/]
- [https://support.apple.com/zh-cn/guide/apple-configurator-2/apdd5f3c75ad/mac]
- [https://www.ifun.de/macos-wiederherstellung-auf-m1-mit-dfu-modus-und-configurator-2-164463/]